
After completing the previous tutorial from our WordPress Tutorial for Beginners.
Posts are blog entries or articles that are displayed in chronological order on your homepage. Unlike pages, posts usually have comments beneath them and are also included in your site’s RSS feed.
Pages are typically used for content that doesn’t change very often. An example of when to use pages are used for contact us or about me page.
Add A New Post
Let’s create your first WordPress post.
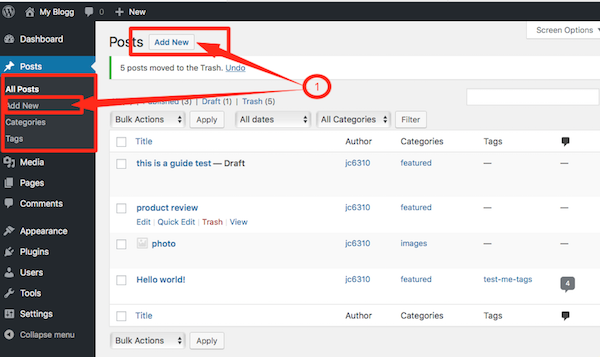
- Click or hover on the “Posts” in the navigation menu at the left hand side of the dashboard. Then click on “Add New”. Also you can add New Post by going to the WordPress Admin Bar and hover on the “+ New” then select “Posts”.
- Now you’ll see the Adu New Post page where you can create your first post.
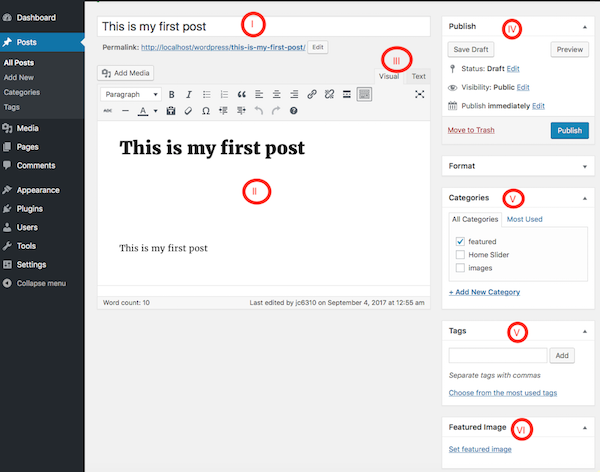
- Now you’ll see the Adu New Post page where you can create your first post.
- The first box is where you’ll want to enter the title of your post. After you save first, a permalink with appear underneath the title field and this can be changed by clicking on the Edit button.
- Next is the Post formatting section or post editor. This is where you’ll actually type the content of your post.
- If you look on the right side of the box, you’ll see two tabs. There are two modes of editing posts: Visual and Text. The Visual tab will bring up the visual WYSIWYG editor. WYSIWYG just means “what you see is what you get.” If you click the Text tab, this will reveal a plain-text HTML version of the post editor. This version of the post editor is for editing the HTML code of your post.
- On the right side of the screen. You will a publish section. The Status of the post will show if the post has been published, saved as a draft, if it’s pending review of if it’s been scheduled. The next two links show the visibility of the post — or what visitors will be able to see your post. The Publish line shows whether the post will be published immediately or at a later date.
- The next section are for categories and tags assigned to your WordPress post. Here you can add or create categories and tags.
- The next section is for featured images. Here you can add the feature image will be displayed on the home page.
- If you ever need help while you’re on the Add New Posts page, just click the Help tab in the upper right corner.
- If you want to add some features like feature images, just click the Screen Options in the upper right corner. And chose want you want.
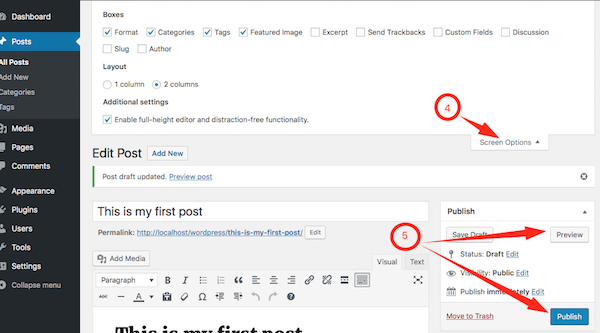
- In the Publish section click “Preview” and if you are happy with it then click “Publish”. That’s it, you have created your first post.
Wrapping Up
So for now, that’s it. If there is any feedback or suggestion please feedback to leave a comment below.